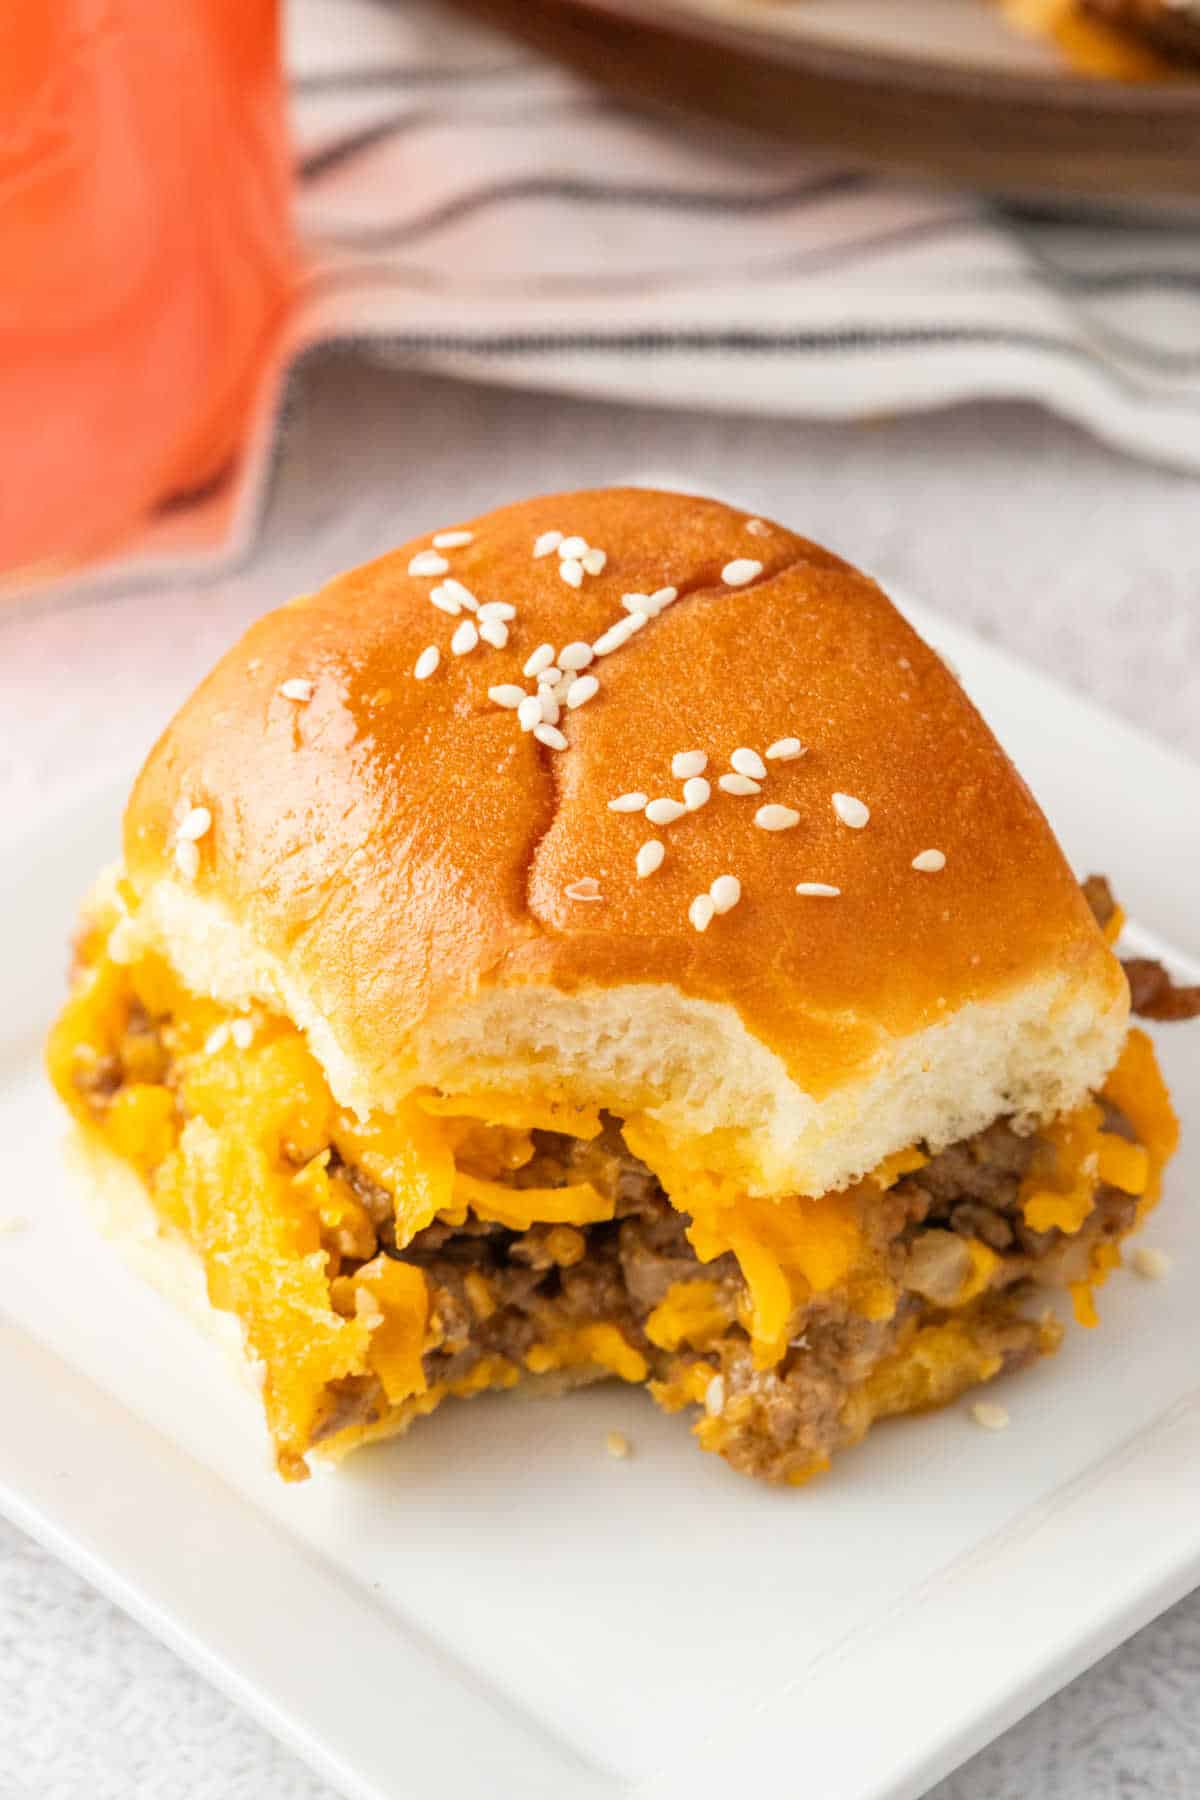
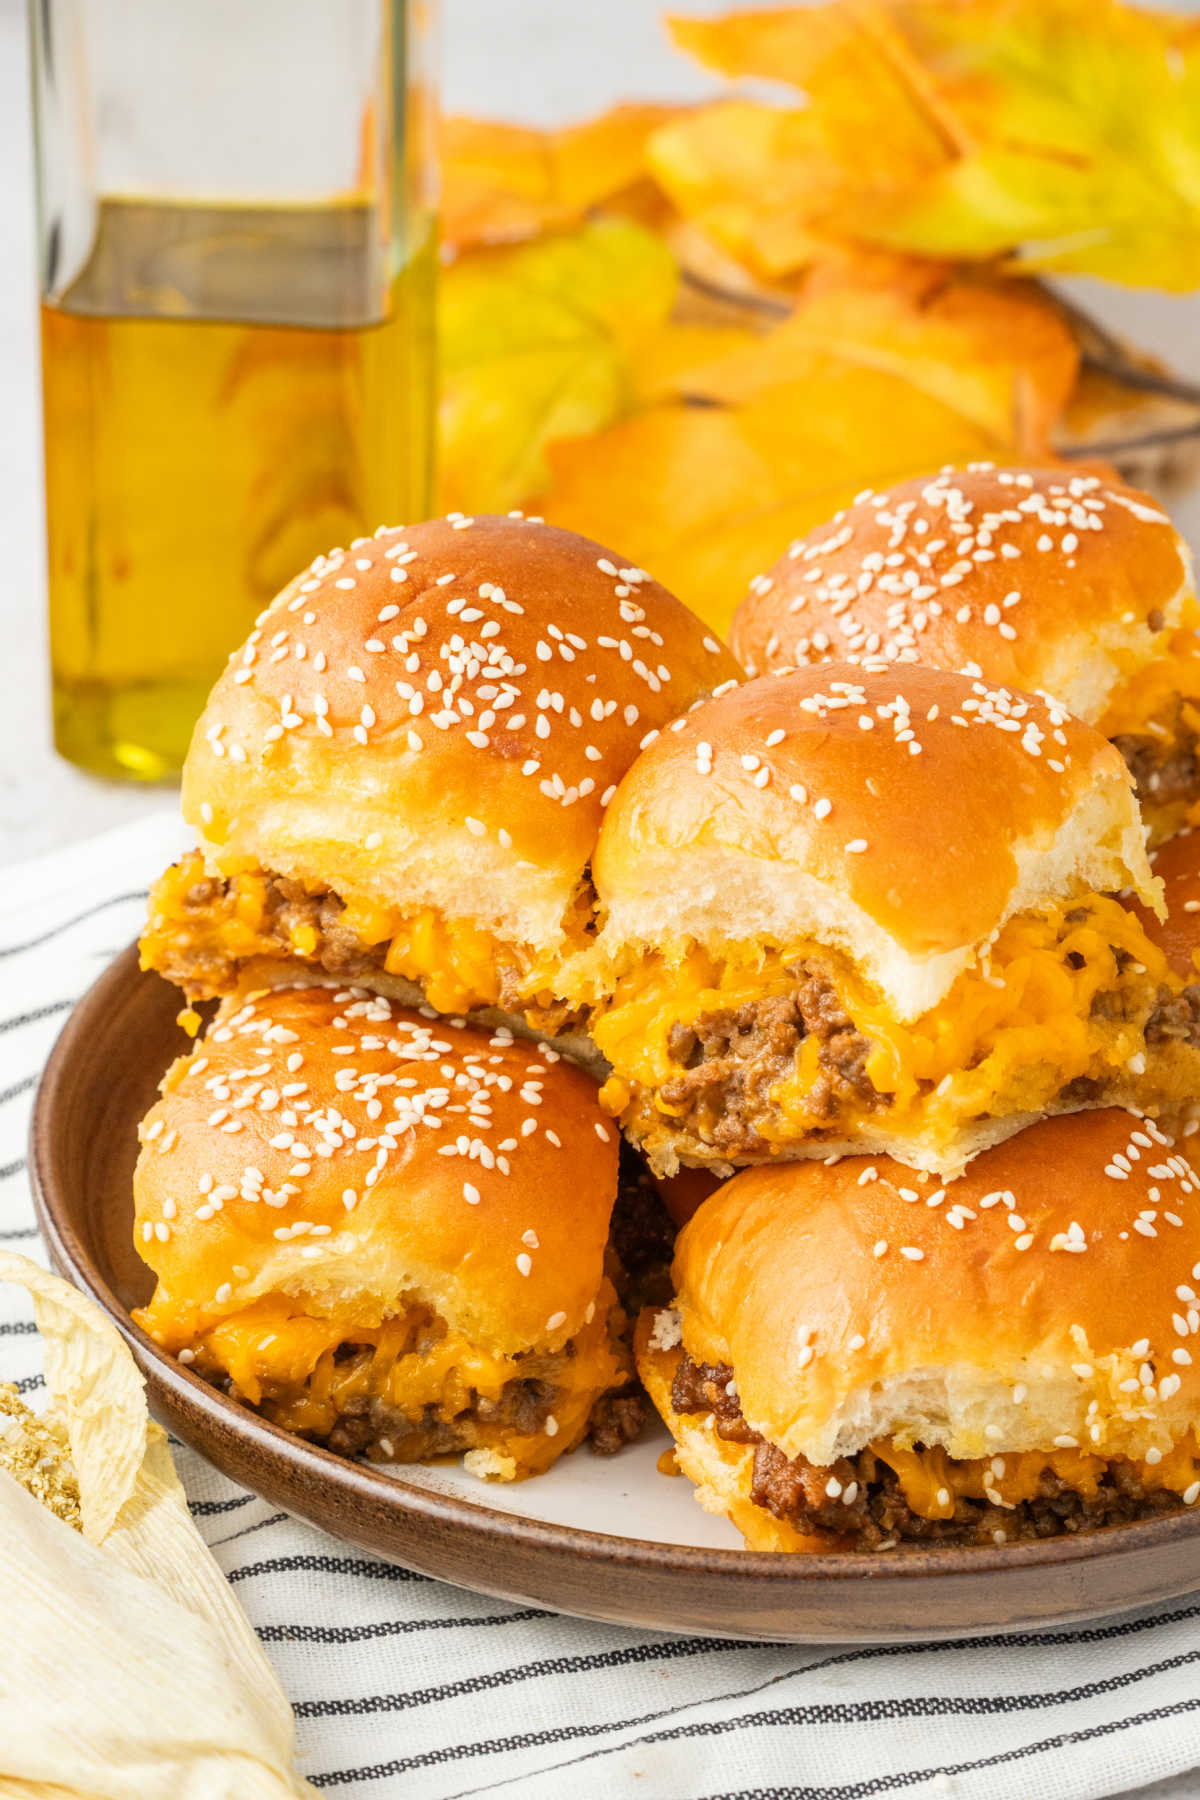
Cheeseburger Sliders
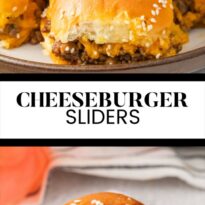
Cheeseburger Sliders are the best cheesy and beefy treat that’s quick and easy to prepare, making them the ideal game day or party appetizer. Baked to perfection, these little burgers pack a delicious flavor, satisfying your cravings in a few delightful bites.
If you are a cheeseburger lover, it’s time to celebrate. This easy cheeseburger sliders recipe is the perfect addition to your menu. Whether you are making them for a crowd or simply want to enjoy a fun mealtime experience, the cheesy goodness of this dish will satisfy your cravings. When paired with fantastic side dishes, they work perfectly as finger food or a full meal. They are also great for game days, backyard BBQs, and birthday parties.
These cheeseburger sliders pack a massive punch of flavor without the fuss of making individual burgers. The amazing combination of crunchy onion, sliced cheese, shredded cheese, and fantastic seasonings adds great flavor to each slider. Add the sauces and serve them on buttery Hawaiian buns topped with sesame seeds, and you have an absolute winner.
Why You’ll Love Cheeseburger Sliders
- Easy to Make: This recipe is easy and quick to assemble. Prep time only takes about 10 minutes, making it an excellent option for a fast yet delicious appetizer or weeknight dinner for busy parents. The best part? They are made with simple ingredients you may already have on hand.
- Portion Control: Cheeseburger sliders are smaller in comparison to traditional burgers. This helps to control portions. They are great for parties, gatherings, or family meals where you want to offer various foods without overindulging.
- Versatile: These cheeseburger sliders are entirely customizable. You can add or remove ingredients at your will and create them according to your preferences. The fact that these are highly customizable allows you to get creative with the base recipe and make it your own.
- Perfect for Parties: Cheeseburger sliders are excellent for serving at get-togethers or parties. They are an absolute crowd-pleaser and make a great finger food option.
Ingredients
The full printable recipe card with measurements and instructions is found at the bottom of the post.
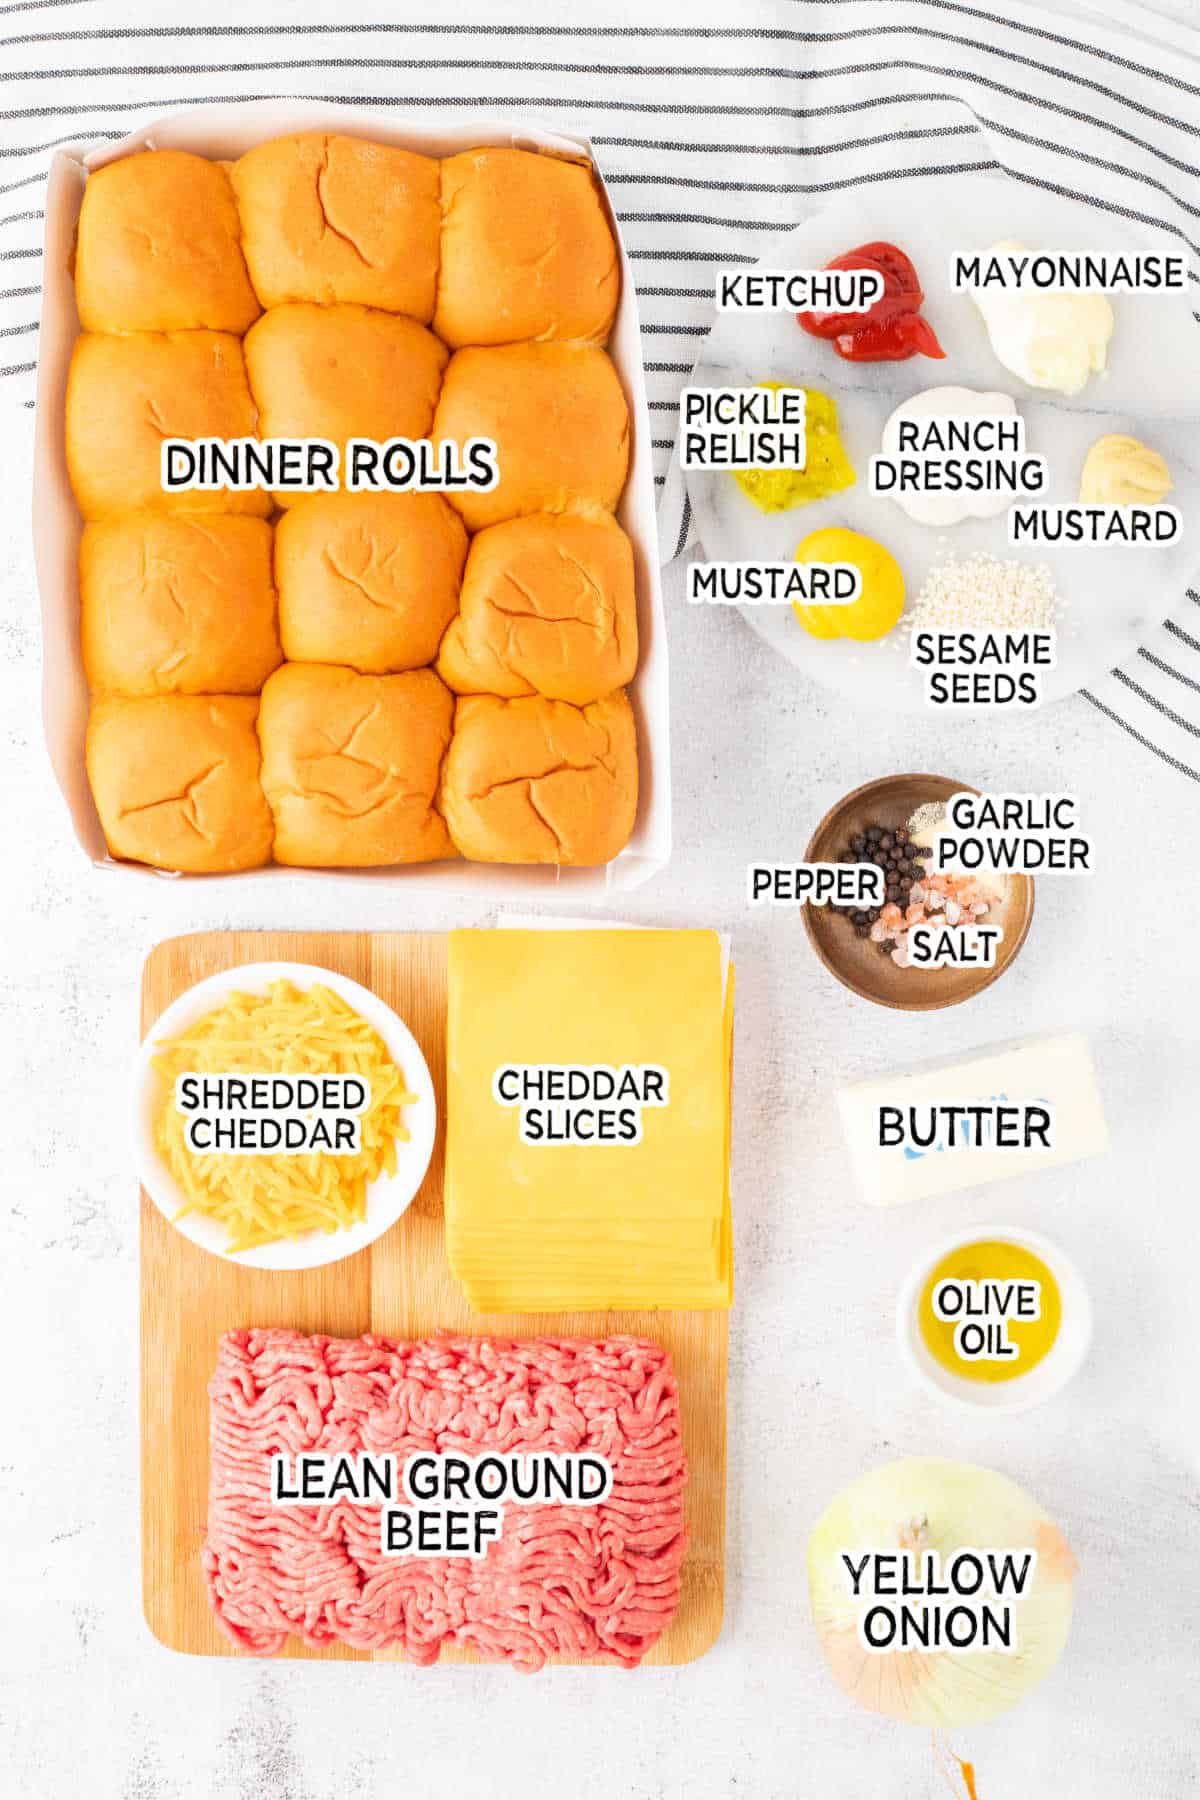
- Butter
- Finely diced yellow onion
- Olive oil
- Lean ground beef
- Salt
- Black pepper
- Garlic powder
- Mayonnaise
- Rance dressing
- Pickle relish
- Ketchup
- Sliced medium cheddar cheese
- Shredded medium cheddar cheese
- Dinner rolls
- Sesame seeds
How to Make Cheeseburger Sliders
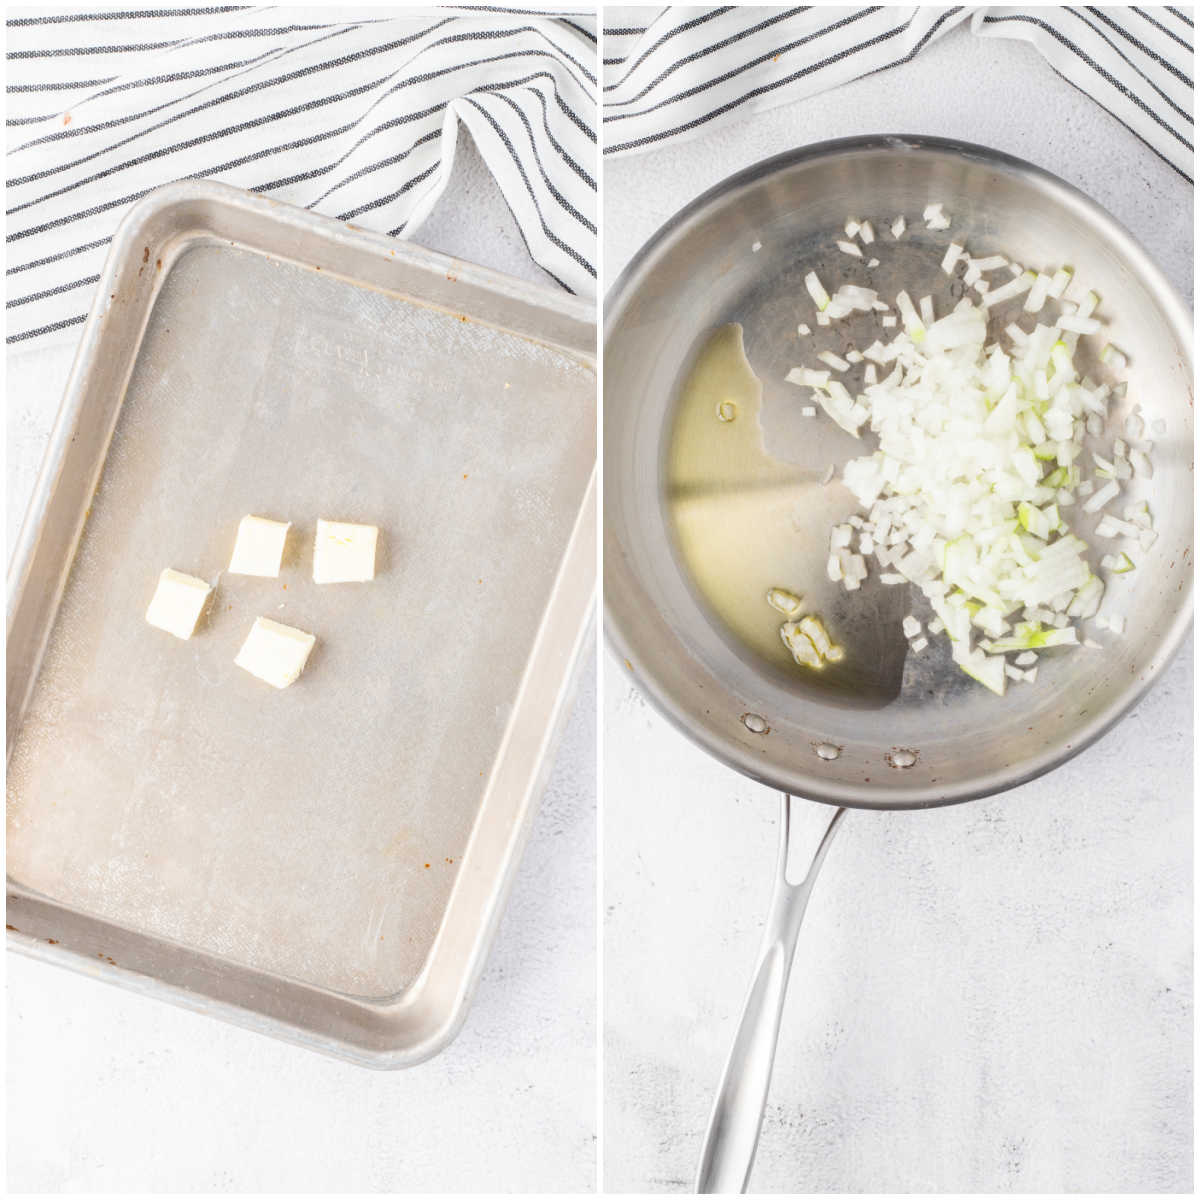
- Step One: Preheat oven to 350°F, and butter the bottom of a rimmed baking sheet with about a tablespoon of Butter. (this will give the sliders a crispy, buttery bottom).
- Step Two: Dice Onion finely.
- Step Three: Place a skillet over medium-high heat and add Olive Oil. Add diced onion and cook for a minute, then add Ground Beef and break up with a spatula—season with Salt, Pepper, and Garlic Powder. Sautee over medium-high heat, break up the beef and cook until cooked. Remove from heat.
- Step Four: Tilt the skillet to spoon off and discard excess fat. Stir in Mayonnaise, Ranch Dressing, Relish, Ketchup, and Mustard. Mix, match, and substitute as you like—some like barbecue sauce.

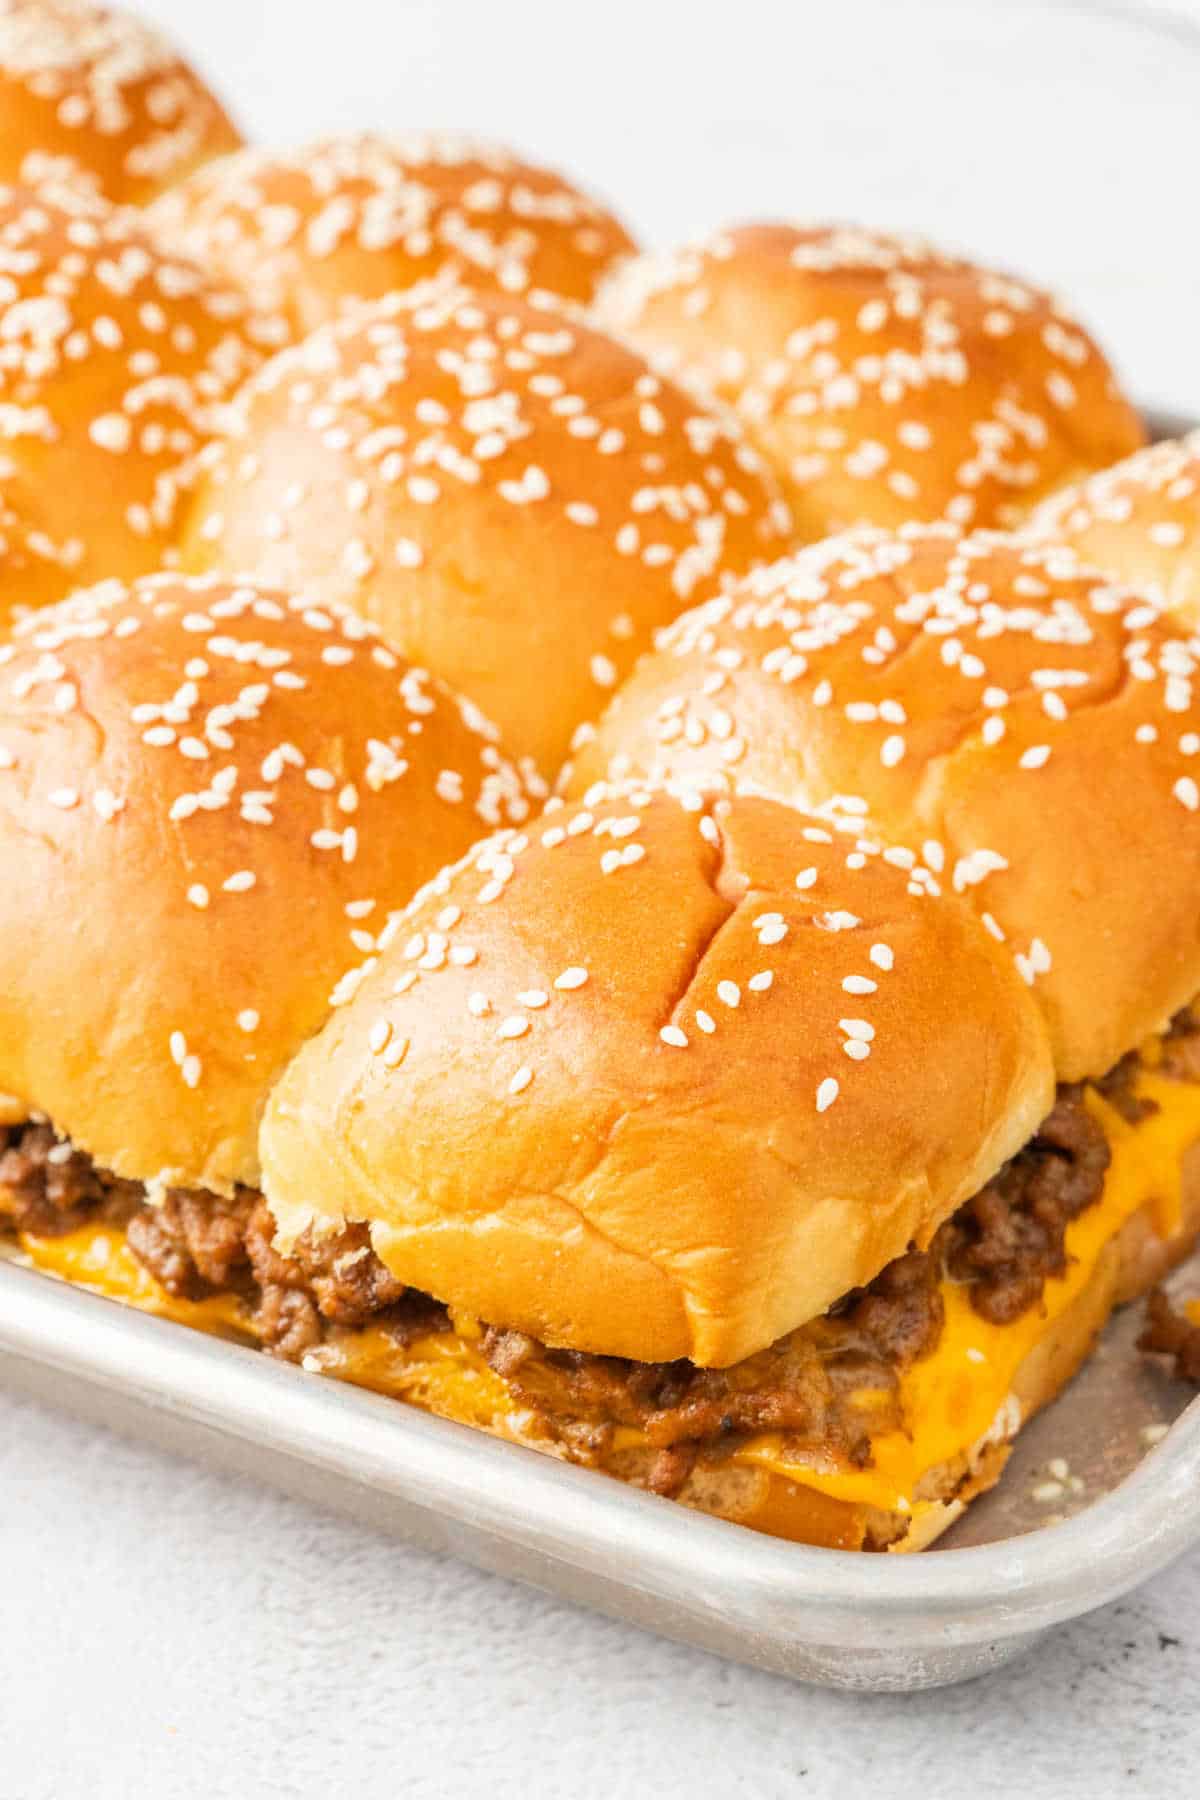
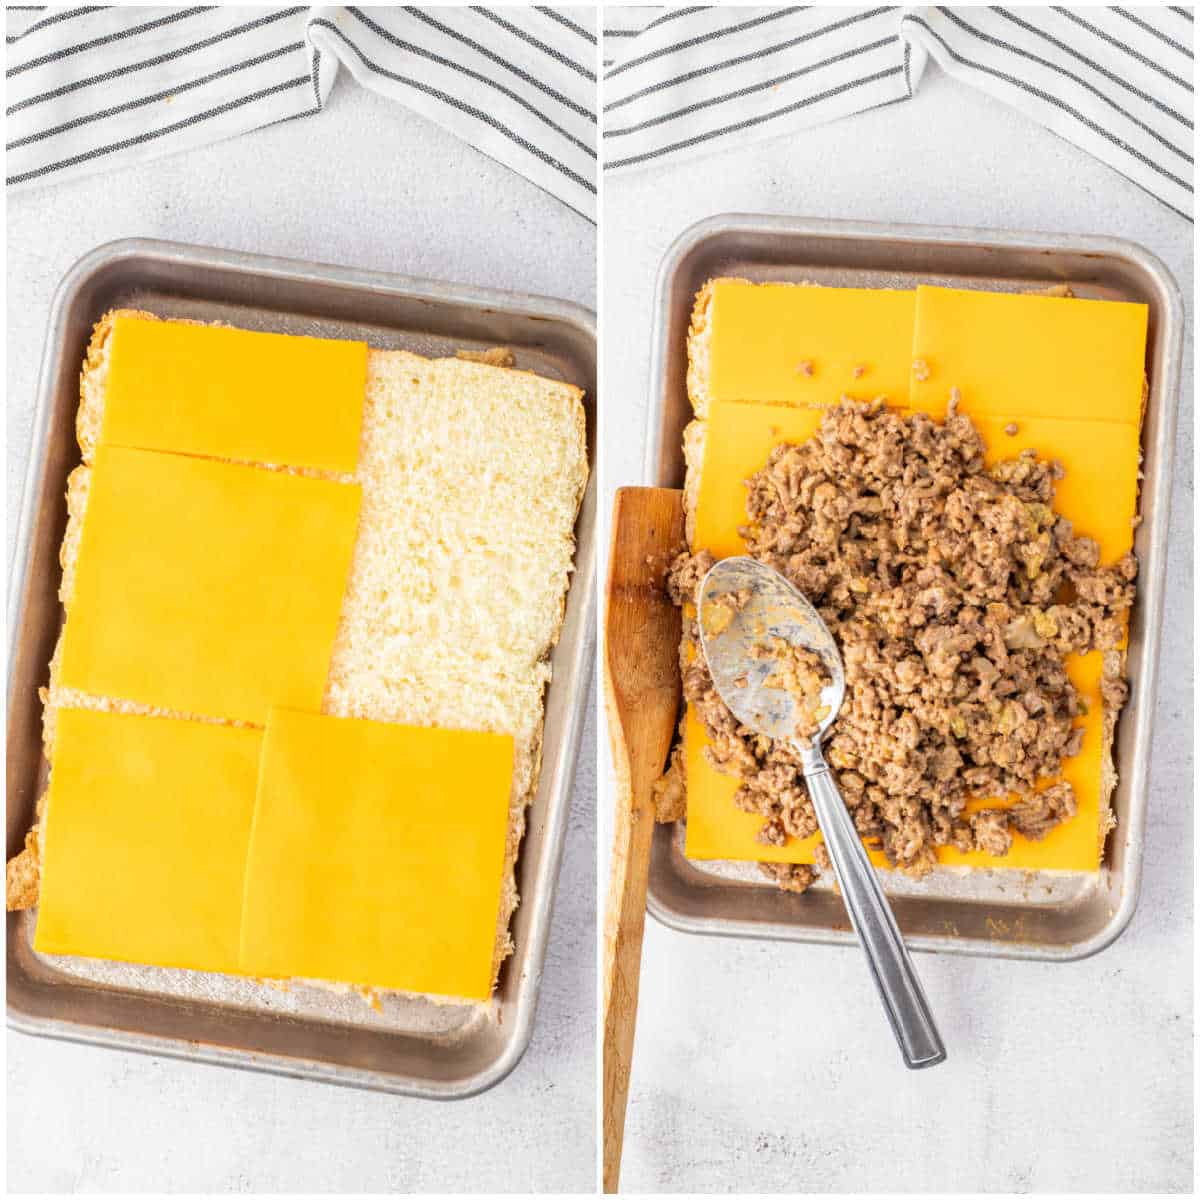
- Step Five: Slice all of the Dinner Rolls in half horizontally, carefully keeping them together. Place the bottom half of the Dinner Rolls on the buttered baking sheet.
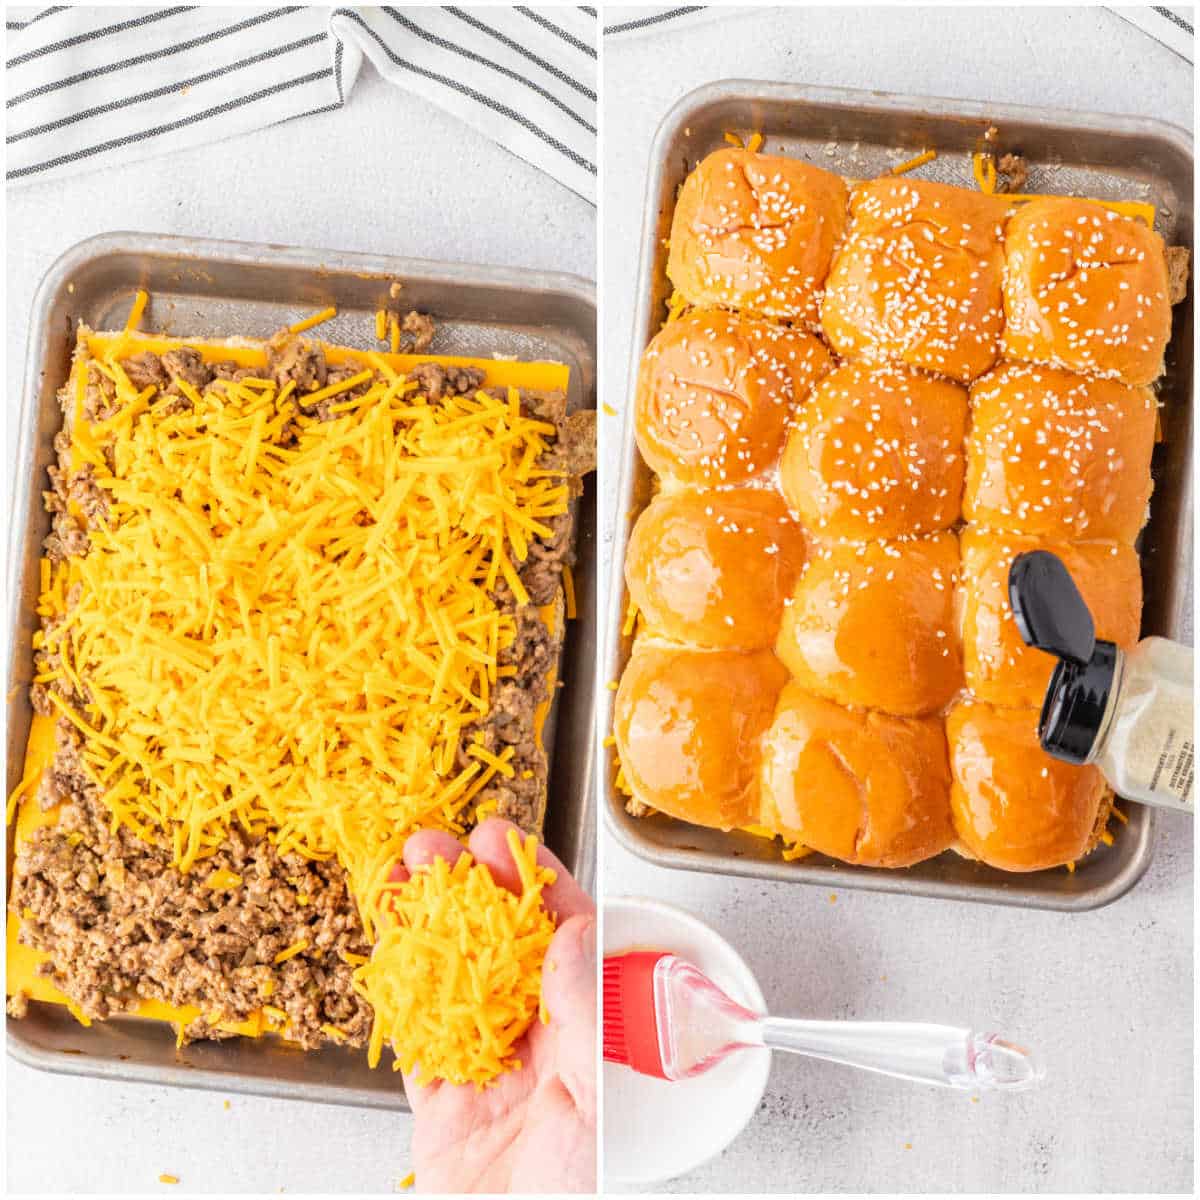
- Step Six: Line the exposed bread with the Cheddar Cheese slices. Spread the ground beef mixture evenly over the sliced cheese layer, using a spatula to square off the edges. Cover the ground beef mixture with the shredded Cheddar Cheese.
- Step Seven: Place the top of the Dinner Rolls over the grated cheese layer. Brush tops with a tablespoon of melted Butter mixture, and sprinkle tops with sesame seeds.
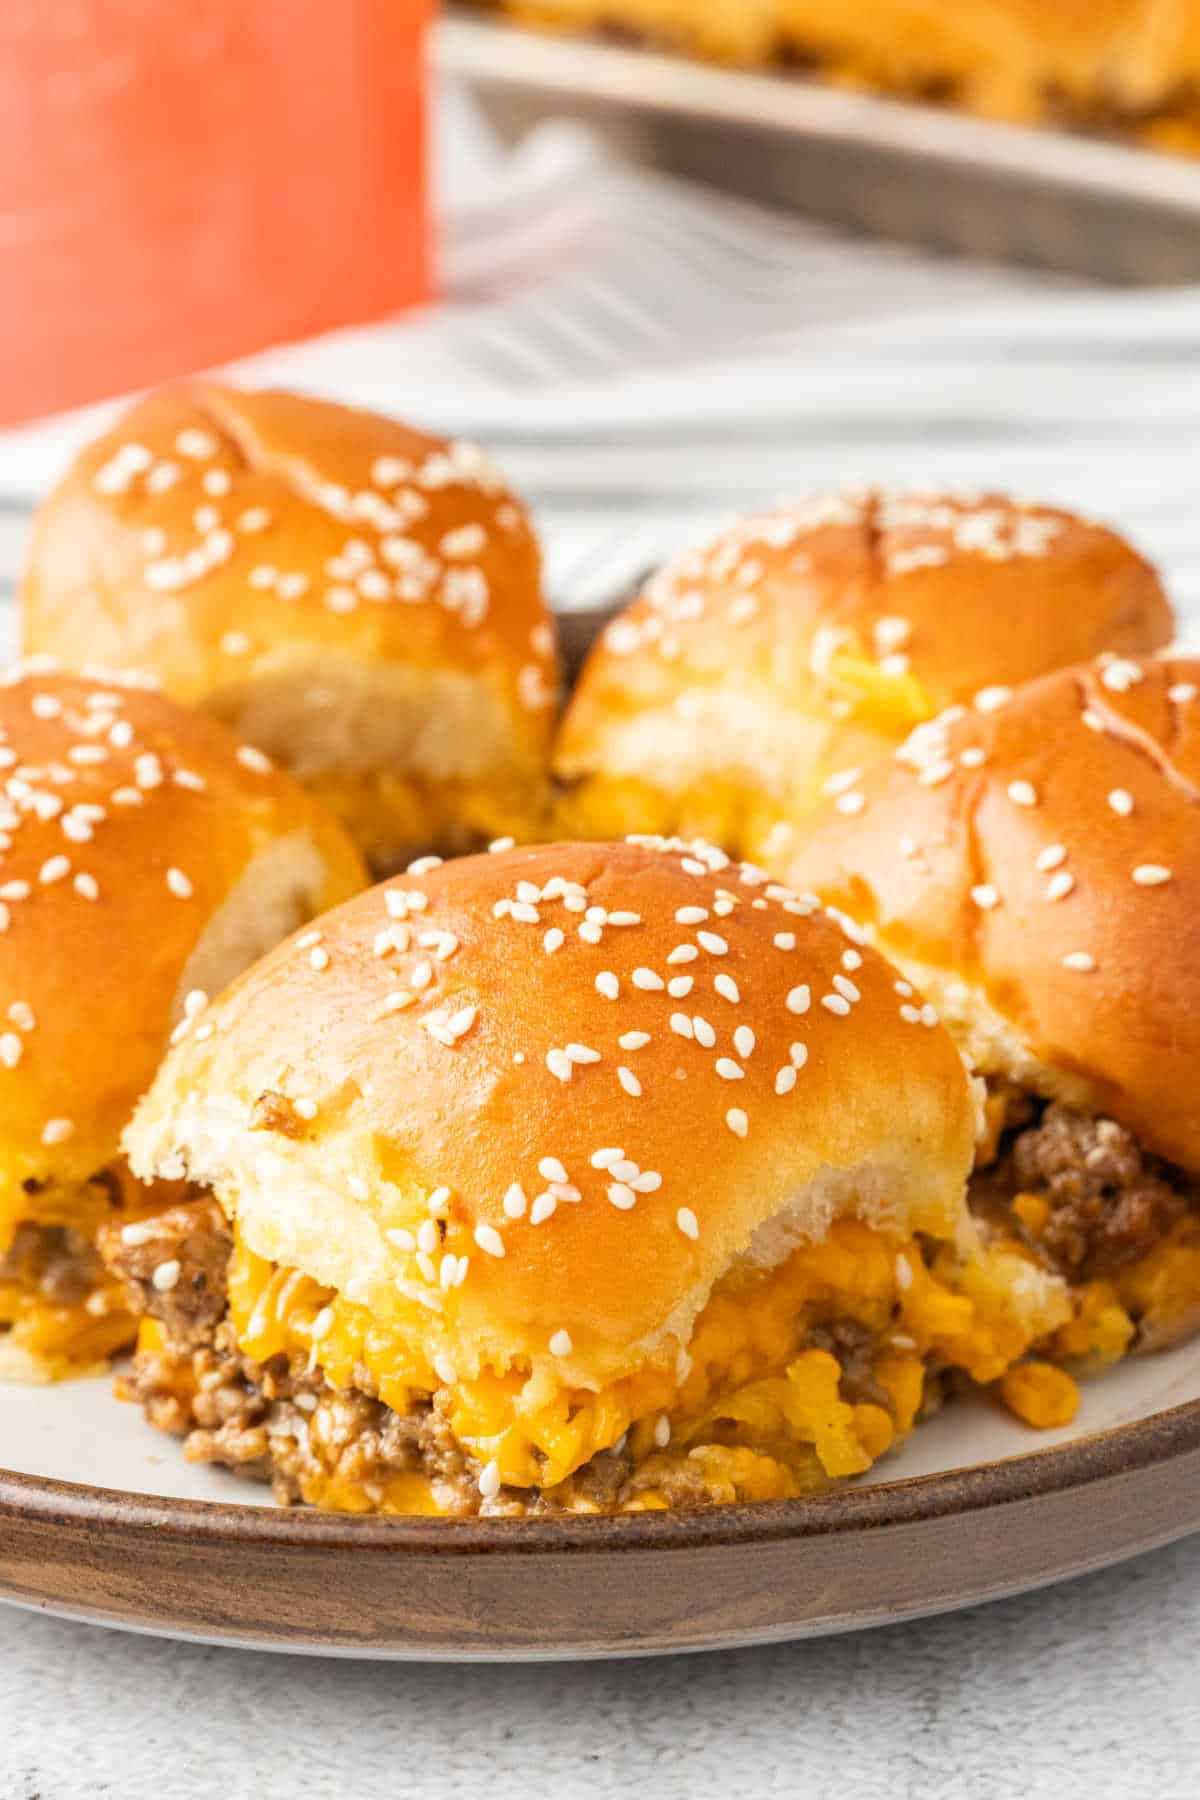
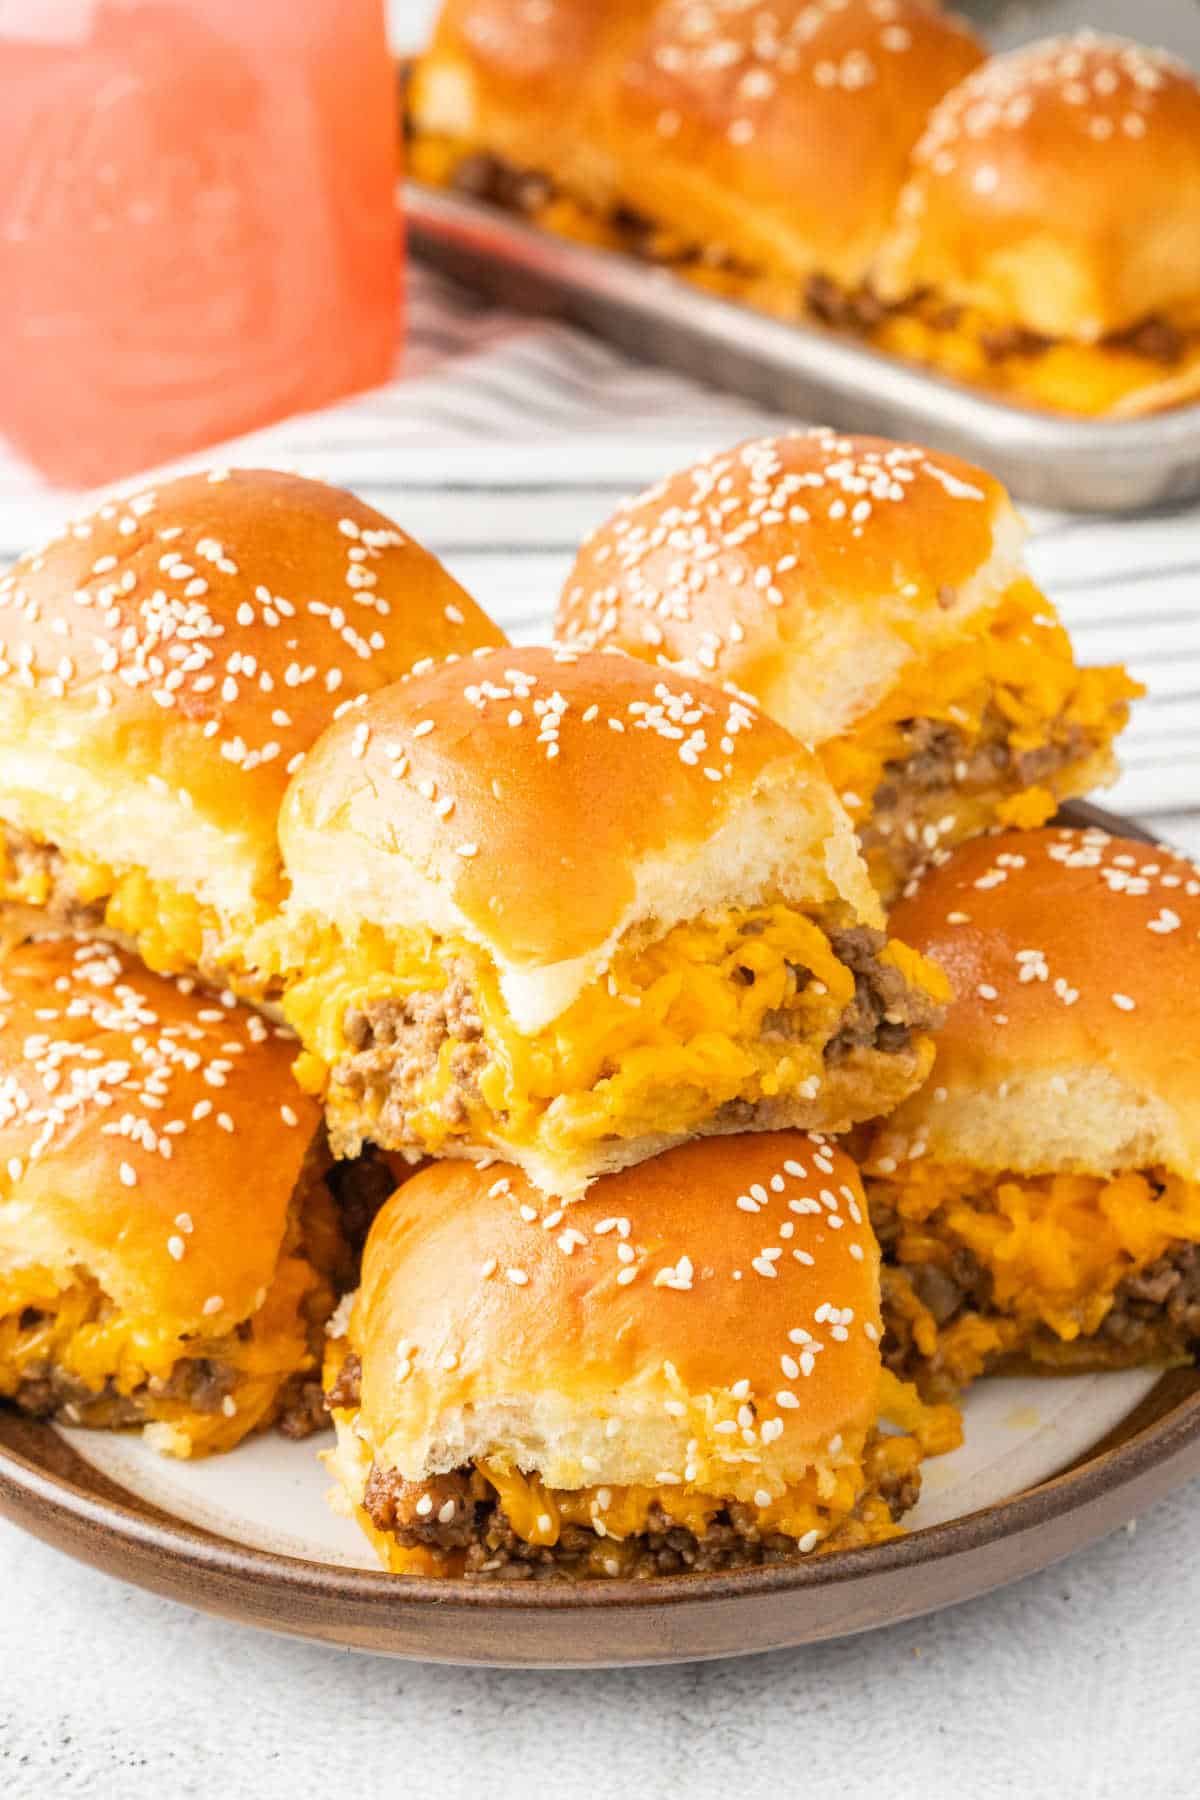
- Step Eight: Place a loose aluminum foil tent over the sliders and place them in the oven. Bake for 10 minutes, then remove the foil tent and bake another 3 to 5 minutes until the cheese is melted and the tops are golden brown. Remove from oven and cut along the Dinner Roll lines. Enjoy warm.
Equipment Needed
This post contains affiliate links.
What to Serve with Cheeseburger Sliders
There are several different things you can choose to serve with cheeseburger sliders. Serve them alongside your favorite appetizers for a delicious party spread or with your favorite sides for a quick weeknight dinner.
- Cheeseburger Dip
- Air Fryer Fried Pickles
- Cucumber Salad
- Broccoli Salad with Homemade Ranch Dressing
- Air Fryer Potato Chips
- Buffalo Chicken Dip
Variations and Substitutions
- Sauces: The variety of sauces you can use for your cheeseburger sliders is expansive. You can use the listed sauces, add others like Dijon mustard, or create your burger sauce. It’s entirely up to you what kind of sauces you want.
- Toppings: These sliders have onion on top, but you can always leave that off. You can also add a pickle slice, lettuce, tomato, or caramelized onions. Add crispy bacon to the top to make them bacon cheeseburger sliders.
- Cheese: This recipe calls for sliced and shredded cheddar, but you can easily use only sliced or shredded cheese. You can also use types of cheese like provolone, pepper jack, or even American cheese slices.
- Buns: While the recipe calls for buns like King’s Hawaiian Rolls, you can also use slider buns, dinner rolls, pretzel buns, or even whole wheat rolls.
Storage Instructions
While the chances of you having leftovers of these fantastic mini burgers are slim, you can store them if you find yourself with leftovers. Simply refrigerate them in an airtight container for up to 3 days.
Can I Freeze?
These can be frozen but are much better off consumed when freshly made. To freeze, wrap individual sliders in plastic wrap and then in foil. Place them in a freezer-safe container and store them in the freezer for up to 3 months.
Recipe Tips and Tricks
- High-Quality Ingredients: Use the highest-quality ingredients that you can find. This will make sure that the flavors are the best they can be. Using the freshest ingredients will create a delicious little cheeseburger.
- Season Generously: Don’t skimp when it comes to seasoning your sliders. You must use the right amount of seasoning to help bring out the flavors you desire.
- Butter the bottom: Don’t forget to butter the baking sheet. Doing this helps to crisp up the bottom half of the rolls and also helps to prevent them from sticking or getting soggy.
Burger Toppings
There are several different burger toppings you can use to create delicious sliders. Get creative with the toppings you choose to make a flavor experience the whole family will love.
- Lettuce
- Tomato Slices
- Red Onion
- Pickles
- Bacon
- Avocado
- Fried Onions
- Jalapeños
- Sautéed Mushrooms
- Fried Egg
- Coleslaw
- Sauces and Condiments (e.g., BBQ sauce, sriracha mayo, chipotle aioli, guacamole)
- Crumbled Blue Cheese
- Pineapple
- Sliced Bell Peppers
- Caramelized Onions
- Arugula
- Sprouts (e.g., alfalfa or broccoli sprouts)
- Feta Cheese
- Pesto
What are the Best Rolls for Sliders?
You can use several different types of rolls to create delicious sliders.
- Slider Buns
- Mini Brioche Buns
- Potato Rolls
- Hawaiian Rolls
- Pretzel Rolls
- Whole Wheat Rolls
- Ciabatta Rolls
- Sourdough Rolls
How to Reheat
Microwave Method:
- Step One: Place the leftover cheeseburger sliders on a microwave-safe plate.
- Step Two: Cover the plate with a microwave-safe microwave-safe cover or damp paper towel to prevent the sliders from drying out.
- Step Three: Heat on medium power (50-70%) for 30-45 seconds per slider, depending on your microwave’s wattage. Check after each interval to avoid overheating.
- Step Four: Remove the sliders from the microwave when heated.
Oven Method:
- Step One: Preheat your oven to 350°F (175°C).
- Step Two: Wrap the sliders individually or as a group in aluminum foil, leaving the top open for steam to escape.
- Step Three: Place the wrapped sliders on a baking sheet.
- Step Four: Heat in the preheated oven for about 10-15 minutes or until they are heated through.
Skillet Method:
- Step One: Heat a non-stick skillet over medium heat.
- Step Two: Place the cheeseburger sliders in the skillet.
- Step Three: Cover the skillet with a lid or aluminum foil to help retain moisture.
- Step Four: Heat for 2-4 minutes on each side or until they are heated through and have a slightly crispy exterior.
Air Fryer Method:
- Step One: Preheat your air fryer to 350°F (175°C).
- Step Two: Place the sliders in the air fryer basket in a single layer.
- Step Three: Heat for about 3-5 minutes, checking for doneness and flipping them halfway through.
- Step Four: Remove the sliders from the air fryer when heated to your liking.
Can I Make Ahead?
It is best to enjoy these mini cheeseburgers fresh out of the oven. However, you can assemble the sliders, and instead of baking them, wrap them in foil and refrigerate overnight until you are ready to bake them. Then, follow the instructions for baking to heat them.
Can I Double?
Yes, you can double the recipe to make more cheeseburger sliders. To double the recipe, you’ll need to adjust the quantities of the ingredients accordingly.
What is a Slider?
A slider is a small, bite-sized sandwich featuring fillings like mini-hamburgers or other options served on small, soft rolls. They are typically smaller than regular sandwiches and are often enjoyed as snacks or appetizers. Sliders often feature a sweet and soft bun, making them popular for parties and gatherings.
Slider vs. Sandwich
Sliders are small, bite-sized sandwiches typically served on small, soft rolls, often featuring mini-hamburgers or various fillings, making them ideal for snacks and appetizers. Sandwiches, on the other hand, come in larger sizes with various fillings, served on regular-sized bread slices or larger buns, and can be a complete meal or stand-alone dish, available in numerous styles and variations. The primary difference lies in their size and the way they are served.
How to Keep Sliders From Getting Soggy
- Toast the Buns: Toasting the buns, either in a toaster, on a griddle, or in the oven, can create a barrier that helps prevent moisture from the filling from soaking into the bun.
- Meat Drainage: After cooking the meat, let it rest on paper towels to drain any excess grease before adding it to the sliders. This helps prevent the bun from absorbing too much oil.
- Serve Promptly: Sliders are best enjoyed soon after assembly. If you’re making sliders for a group, consider setting up a slider bar, allowing guests to build their sliders when ready to eat.
- Keep Ingredients Separate: If you’re preparing sliders ahead of time or for a party, keep the wet and dry ingredients separate until serving. Guests can then assemble their sliders to their liking, reducing their chances of becoming soggy.
FAQ
This recipe yields 12 sliders, but it can easily be doubled to make more if serving a larger crowd.
It takes about 10 minutes to prepare and 13 minutes to bake. Allow for 2 minutes to cool before serving.
Slider Recipes
- Italian Sliders
- Slow Cooker Buffalo Chicken Sliders
- Thanksgiving Sliders
- Breakfast Sliders
- Meatball Sliders
- Ham and Cheese Sliders
- Spaghetti and Meatball Sliders
Follow me on Instagram @simplystacieblog, Facebook at Simply Stacie, TikTok @simplystacierecipes or Pinterest at @simplystacie and let me know how you liked this recipe and my other recipes.

Cheeseburger Sliders
SAVE THIS RECIPE!
Ingredients
- 2 tbsp unsalted butter divided
- ⅓ large yellow onion finely diced
- 1 tbsp extra virgin olive oil
- 1 lb lean ground beef
- ½ tsp salt
- ¼ tsp black pepper
- ½ tsp garlic powder
- 1 tbsp mayonnaise
- 2 tbsp ranch dressing
- 2 tbsp pickle relish
- 2 tbsp ketchup
- 2 tbsp mustard your favorite mustard(s)
- 6 slices medium cheddar cheese
- 6 oz shredded cheddar cheese or use more sliced cheese
- 12 dinner rolls King's Hawaiian works great
- 2 ts sesame seeds
Instructions
- Preheat the oven to 350℉. Butter the bottom of a rimmed baking sheet with a tablespoon of butter to give the sliders a crispy, buttery bottom.
- Add extra virgin olive oil to a skillet over medium-high heat. Add diced onion and cook for 1 minute. Add the ground beef and break up with a spatula.
- Season with salt, pepper and garlic powder. Continue to break up the beef until the beef is fully cooked, about 7 to 8 minutes. Drain the excess grease.
- Stir in mayonnaise, ranch dressing, relish, ketchup and mustard.
- Slice the dinner rolls in half, horizontally, while still together as one unit. Try to keep them together.
- Place the bottom half of the dinner rolls on the buttered baking sheet.
- Add the cheddar cheese slices on the bottom half of the dinner rolls.
- Spread the ground beef mixture evenly over the sliced cheese layer. Use a spatula to square off the edges.
- Add the shredded cheddar cheese on top of the ground beef.
- Place the top of the dinner rolls over the grated cheese. Brush the tops with a tablespoon of melted butter and sprinkle sesame seeds on top.
- Place a loose aluminum foil tent over the slider and place in the oven. Bake for 10 minutes. Remove the foil tent and bake an additional 3 to 5 minutes or until the cheese is melted and tops are golden brown.
- Remove from the oven and cut along dinner roll lines. Enjoy them warm.
Nutrition
The information shown is an estimate provided by an online nutrition calculator. It should not be considered a substitute for a professional nutritionist’s advice.
Did you make this recipe?
I’d love to see it! Make sure to share it on your favorite social platform.
Want Even More Recipes?
Join Moms Best Recipes to find more delicious family recipes.
free ebook!
The Best of Simply Stacie
When you subscribe to the newsletter for the latest updates!